
Decide what stays sharp and how bright your photo looks: tap to focus, adjust the brightness and turn on the grid to frame straight.
Tell focus from brightness
A photo can fail for two different reasons, and each one is corrected in its own way.
- Focus: it determines where detail looks sharpest.
- Exposure: it controls the brightness of the picture.
A face can be in focus but too dark, or a bright scene can lose detail in the light areas. The phone adjusts both automatically, but you can guide the choice.
With people, tap the face or the eyes you want to stand out. If there is glass, a fence or a nearby object, check that the camera is not focusing on that obstruction.
Adjust focus and brightness step by step
- Frame the scene in Photo mode.
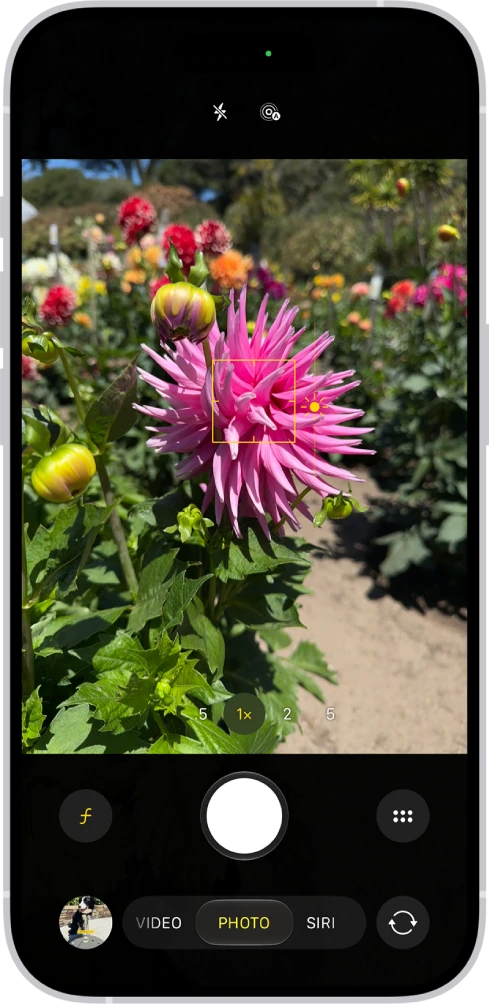
- Tap the subject and look for the focus box and the brightness control beside it.
- Next to the focus box, drag the exposure control, usually shown as a sun, up or down to brighten or darken.
- Take the photo.
- Open it in Photos and zoom in to compare the actual result.
As you drag, watch skin, sky and lights in particular: a photo that is too bright can lose detail. The screen's brightness can mislead you in sunlight or when it is set very low, which is why it helps to zoom into the photo you took.
Lock the focus to reframe
To hold focus and exposure while you reframe a stable scene, touch and hold the subject until you see AE/AF Lock. Tap the screen to return to automatic adjustment. Locked focus does not automatically follow a person who changes distance.
Find better light before correcting
- For a portrait, place the person facing a window or in open shade, that is, in the shade but facing a bright open space.
- Avoid mixing light sources of different colors if you want natural tones.
- If there is a very bright window behind, change angle or position before trying to fix everything with exposure.
In low light, the camera may need more time, and the subject's movement still matters.
Frame with Grid and Level
To turn on Grid and Level, open Settings, tap Camera and turn on both options. Align horizons and try placing the subject off-center. Look at the edges so you do not cut off hands or important elements by accident.
YOUR TURN
Try it now
You did it if you have two photos of the same object and can point to the one where the object and the light areas are easier to make out.
Your progress is saved only in this browser. No sign-up.