
Send your photos knowing what travels with them: choose a copy, an original or a shared album, and check location and recipients before sharing.
Know what travels with a photo
Besides the image, a file may contain metadata, which is data that goes along with it: location, date, device, caption and keywords. A photo of a house or a document can also reveal information within the frame. Review both before publishing.
Sharing a copy is not the same as inviting someone to a library or an album. Not every app preserves quality, Live Photos, depth or edits either.
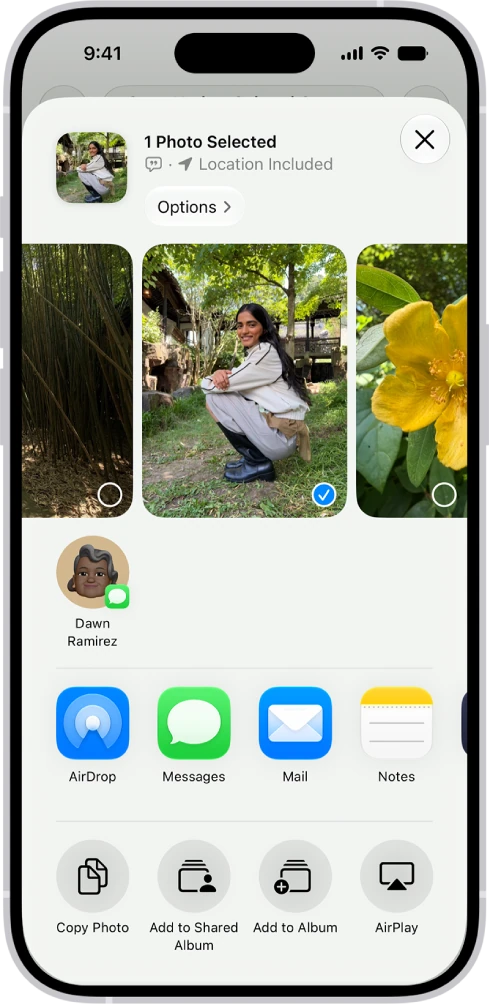
Share a selection
- In Photos, tap Select and tap only the pictures you need.
- Tap the Share button.
- Tap Options before choosing the destination.
- Review location and the other available metadata; if you do not want to send your tags, turn off Keywords.
- Choose the format: Automatic picks the best one for the destination, Current prevents conversion and Most Compatible may convert files to JPEG or MOV.
- If you send by AirDrop, identify the recipient and confirm their device.
- Confirm it arrived and open the copy that was sent. A thumbnail in a conversation does not prove the other person has the full original.
Export originals for safekeeping
If you need an independent copy, connect an external drive or a memory card to the iPhone, select the photos, tap the Share button and tap Export Unmodified Original. Then tap the drive, below Locations, and tap Save. That export keeps the original without its current edits; to save the edited look as well, keep an additional copy.
- Wait for the iCloud originals to download when needed.
- Check the files, their number, their size and that they open from the destination before deleting anything from the library.
- Do not leave a compressed messaging copy as your only archive.
Review the permissions of a shared album
A shared album is an album you invite other people to; they can see your photos and add their own. In iOS 27, new or upgraded albums can offer full-resolution pictures, web participation and permissions that differ from older albums. When you create one, you decide who can get in.
- In Photos, tap Collections, then Shared Albums.
- Tap the Add button and type a name for the album.
- Tap Sharing Options and choose People You Choose or Anyone with the Link.
- Tap Done to create the album.
To change what each participant can do, open the album, tap the Manage Shared Album button and tap the person: they can manage the album, add photos or only view and comment. The content uses the iCloud storage of whoever organizes the album. If you turn on Make Album Temporary, the album expires after 30 days and uses no iCloud storage.
YOUR TURN
Try it now
You did it if you could see, before sending, what data and which version would go along with the photo, and nobody received it.
Your progress is saved only in this browser. No sign-up.