
Make your first Time Machine backup: prepare a disk, check that the backup finished and practice recovering a file so you know it works.
Understand why iCloud is not enough
A backup is a copy of your files kept outside your Mac, so you can get them back if something fails. Time Machine is the macOS tool that makes that copy and keeps versions of your files.
iCloud syncs information, which is not the same as a backup: a deletion can sync too. Files stored only in the cloud need to be downloaded if you want a local copy included in the backup.
Time Machine backs up your files and added apps, not a bootable copy of macOS.
Choose the disk
Use an external drive dedicated to backups or a network destination that supports Time Machine. As a guideline, Apple recommends a disk with at least twice your Mac's internal storage capacity.
Set up Time Machine
- Connect the drive and check its name and capacity in Finder, the app where you see your files and disks.
- If the drive contains anything you want to keep, copy it elsewhere before continuing.
- Open the Apple menu and choose System Settings.
- Click General in the sidebar, then click Time Machine.
- Click Add Backup Disk.
- Choose the correct drive in the list and click Set Up Disk.
- In the window that appears, decide whether to encrypt backups, meaning protect them with a password, and click Done. Keep that password safe: you will need it to recover files.
- If your Mac asks whether to erase the disk, read the warning: Erase permanently removes everything on it.
- Keep your Mac connected to power and the disk available until the first backup finishes. You can keep working, although the first backup can take a while.
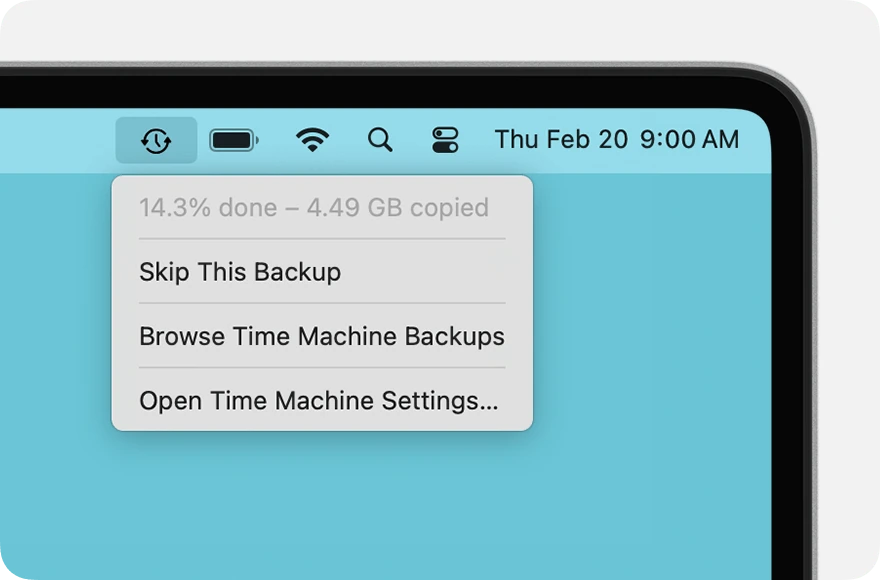
- Click the Time Machine icon in the menu bar. The top of the menu shows the progress or the date and time of the latest backup.
Recover a file when you need it
A backup is worth what it lets you recover.
- In Finder, open the folder where the file was.
- Open Time Machine: press Command + Space bar, type Time Machine and press Return.
- Use the arrows next to the windows to go back to a backup that contains the file.
- Select the file and click Restore. It returns to its original location; read the choices if a file with that name already exists.
Keep the backup current
- Connect the drive regularly. Backups cannot stay current if the destination is never available.
- Eject it in Finder before disconnecting it.
- Write down where your backups are stored and the date of the last completed backup.
Local snapshots are copies that Time Machine saves every hour on the internal drive itself, for up to 24 hours. They are useful, but they cannot protect you if the whole Mac is lost or fails.
YOUR TURN
Try it now
You did it if the test file is back in Documents. Recover only that file to get familiar with the process.
Your progress is saved only in this browser. No sign-up.